

DIY Notebook
Do It Yourself Notebook Using Grafix Materials | Create in your own unique way | by maritzagarcia.website
This blog post is a collaboration with Grafix Arts who also provided me with all the Grafix Brand materials I used for this project. This blog post also contains hyperlinks to Grafix Arts products and/or links to some of the other products I used to create this project. Note: I don’t get compensated via Grafix nor any other company if you purchase any of the materials listed. I add links to help make finding the project products easier for you to find if you are interested. I only recommend products I trust and use for my projects. You will not be redirected to any other website(s) unless you choose to click on the links provided.
Today I’m sharing how I created my own notebook using Grafix ChipBoard + Grafix Clear Craft Plastic and Grafix Double Tack Archival Film. IF YOU LIKE HANDMADE PROJECTS AS MUCH AS WE DO. YOU’RE IN THE RIGHT PLACE! THIS PROJECT REQUIRES CUTTING, PAINTING, Light stitching, and hole poking. IF THIS SOUNDS LIKE FUN TO YOU. PULL UP A SEAT AND CONTINUE SCROLLING DOWN FOR ALL THE DETAILS.

WHAT YOU WILL NEED:
Grafix ChipBoard
Grafix Craft Plastic
Grafix Artist-tac Double Tack Archival film
Ruler
Pencil
Needle
Scissors
Binder Clips
Printer Paper
Any Piercing Tool
Black Permanent Marker
Acrylic Paint and Paintbrushes
Embroidery Floss or Waxed Thread
Project Time: 90 minutes
Instructions
Step 1.
Take one sheet of Grafix chipboard. Cut chipboard down the center to get two equal pieces to measure 5.5" W x 8.5" L each. Once cut, set aside for later use in the project.


Step 2.
Next. Take a sheet of Grafix Craft Plastic (note: Grafix Craft Plastic sheets measure 12" x 12"). You will need to cut this sheet down to measures 5.5" W x 8.5" L. Once cut, set aside for later use in the project.

Step 3.
You will need twenty 8.5” x 11” sheets of plain printer paper. Fold each sheet in half so that all sheets measure 5.5" W x 8.5" L. Make 5 sets (each set needs a total of 4 sheets nested inside one another. You will have a total of 80 blank sheets all together for this notebook.

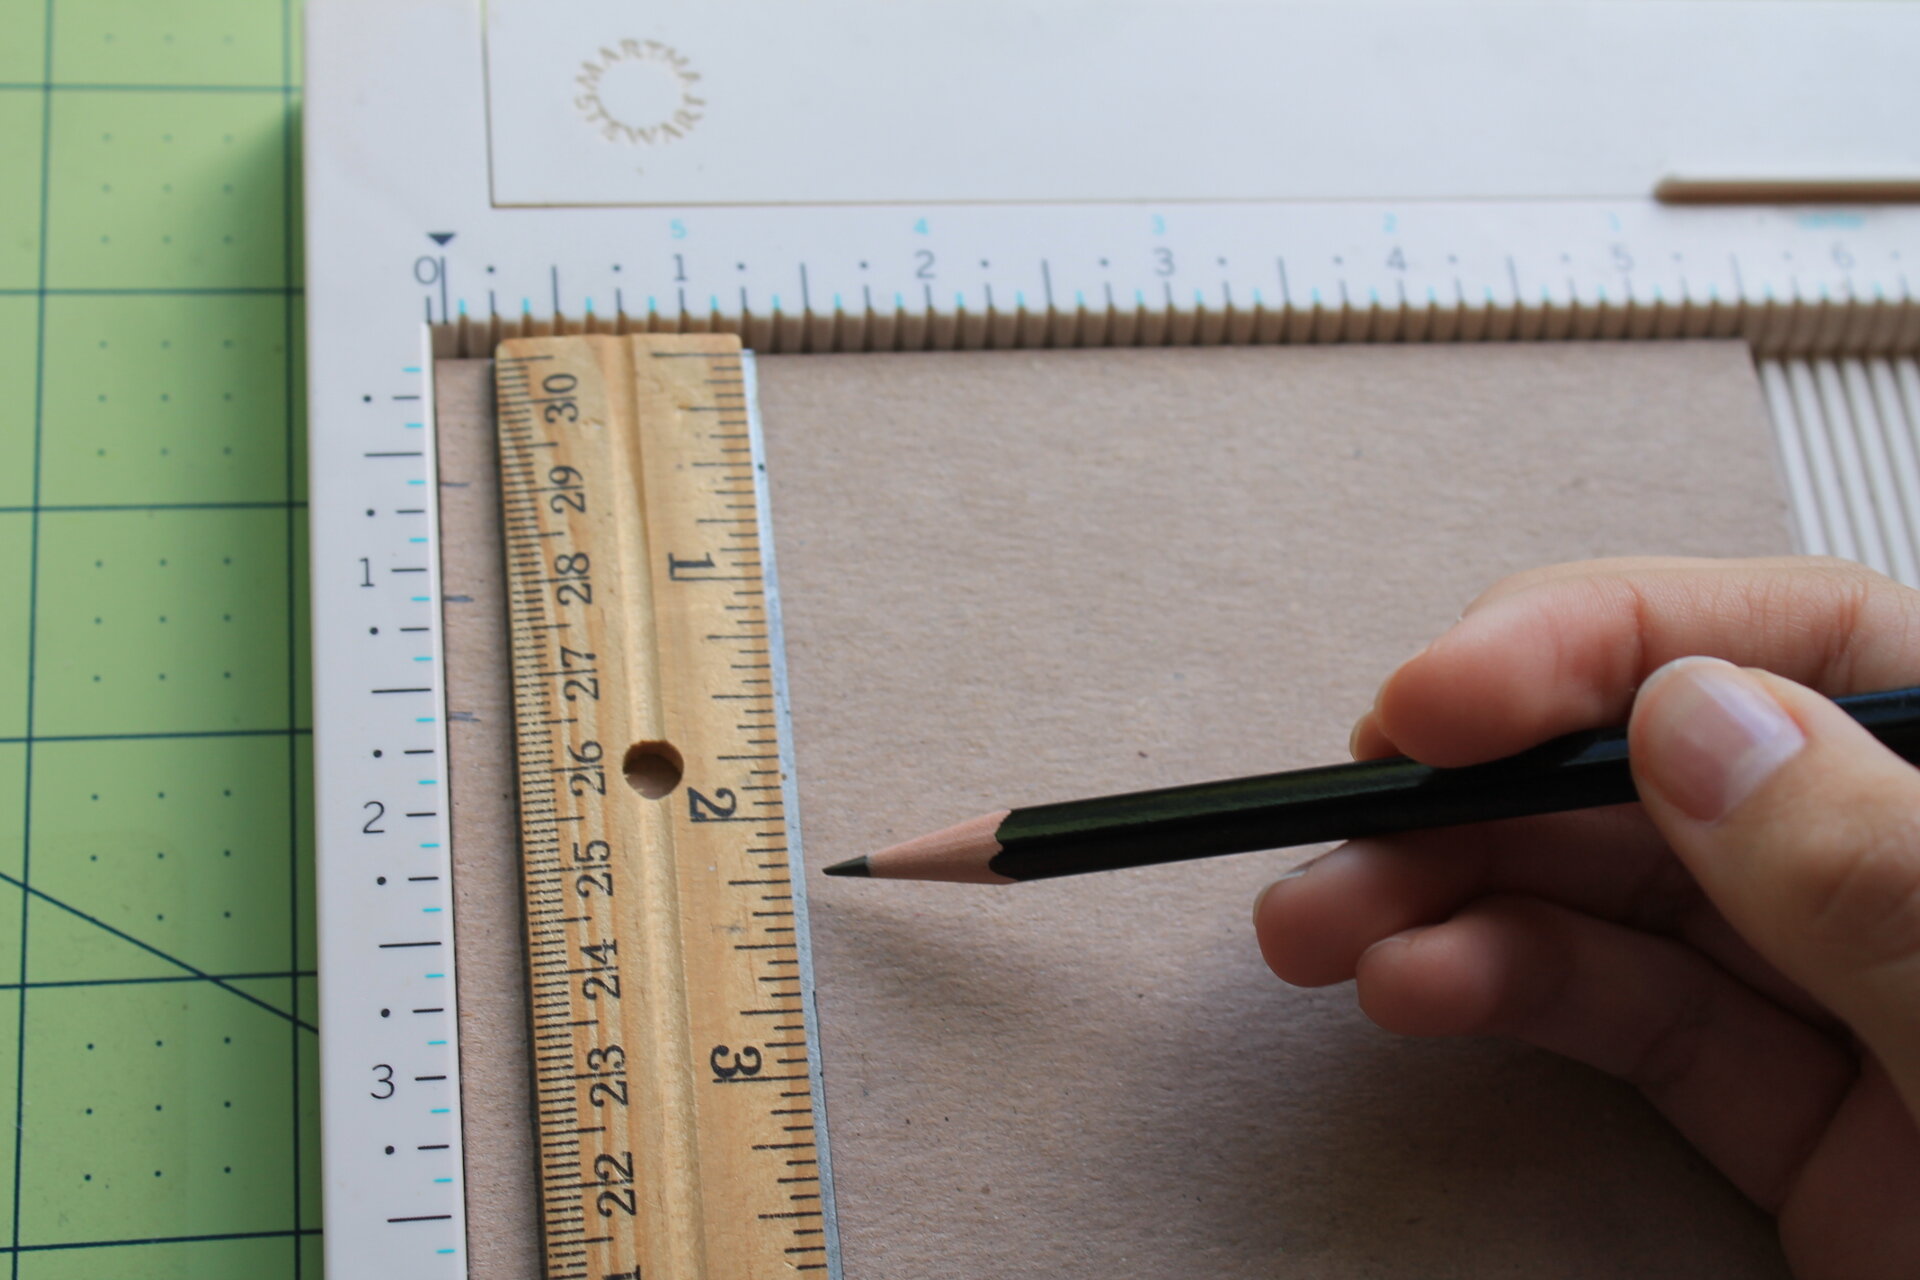
Step 4.
Take one of your chipboard pieces from earlier and draw a 1/8" line straight down the left side of you chipboard from top to bottom. Next, make six 1/4" guideline marks. 3 towards the top of your chipboard, and 3 on the bottom.
Step 5.
Take any piercing tool and pierce through all six 1/4" guideline marks. We went with a Push Pin.

NOTE: your chipboard can now act as a guide for your Grafix craft plastic sheets and folded printer paper pages. Simply align your craft plastic sheets and folded printer paper pages behind your chipboard to pierce them altogether more accurately.

Step 6.
Next. Create a fun pattern/design for your Notebook’s front and back covers by using acrylic paint, color pencils, or color markers. This part is all up to you.

We created a fun abstract design using acrylic paint. Once you are done with this part. Set aside to fully dry and for later use in the project.

Step 7.
For our Notebook tag, we used Grafix Artist-tac Double Tack Archival film. FYI: Grafix Artist-tac Double Tack Archival film can turn anything into a sticker.


Step 8.
Time to assemble this notebook. For this part. You will need embroidery floss or waxed thread, and a sewing needle + scissors.

Step 9.
Lay your notebook down in front of you in two parts.
The front cover side should have 1 sheet of Grafix Craft Plastic. 1 sheet of Grafix chipboard. Optional a second layer of Grafix craft plastic and a fun doodle adhere to Grafix Artist-tac Double Tack Archival film as pictured above in step 7 and two sets of printer paper with a total of 32 blank sheets
The back cover section should have three sets of printer paper with a total of 48 blank sheets. One sheet of Grafix chipboard, and a sheet of Grafix craft plastic.
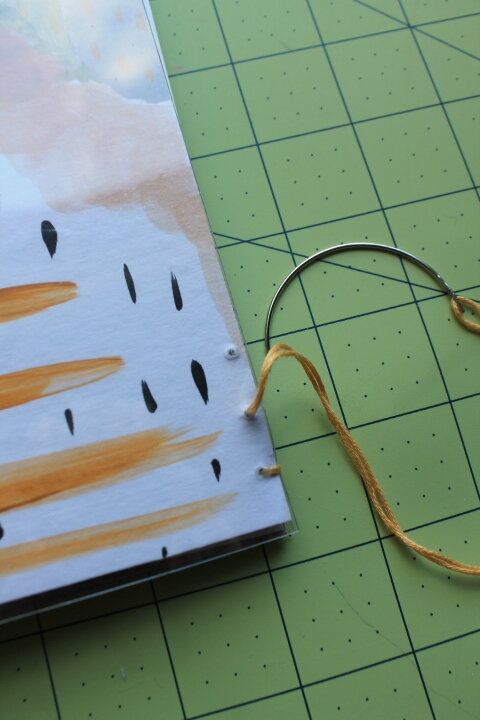
You will be starting from the bottom last hole of the notebook, working your way up the book cover by looping through every layer on the front and back book covers as pictured below.


Step 10.
Once you reach the top of your notebook. Snip off any excess thread for a clean finished look.

I ended up cutting a third piece of Grafix Craft Plastic to use as a divider. I added a fun little polka-dotted pattern with a black permanent marker.
Bonus: using Grafix craft plastic on the front and back covers of your notebook also helps protect the notebook from water damage, and not to mention makes your notebook covers REUSABLE.


Finished Notebook:
Here you have a view of all the pages of this notebook. Cover, first page, center, and back.


AS ALWAYS. I HOPE YOU GIVE THIS DIY A TRY AND DON’T FORGET TO SHARE YOUR KNOT JUST PAPER PROJECTS ON INSTAGRAM USING #KNOTJUSTPAPERDIY for a chance to be featured. UNTIL NEXT TIME. HAPPY CRAFTING!
-Maritza.

