
DIY Shrink Film Cake Toppers
DIY Shrinkable Cake Toppers | Learn to make unique cake toppers at home Using Grafix Shrink Film Sheets | by maritzagarcia.website
This blog post is a collaboration with Grafix Arts who also provided me with all the Grafix Brand materials I used for this project. This blog post also contains hyperlinks to Grafix Arts products and/or links to some of the other products I used to create this project. Note: I don’t get compensated via Grafix nor any other company if you purchase any of the materials listed. I add links to help make finding the project products easier for you to find if you are interested. I only recommend products I trust and use for my projects. You will not be redirected to any other website(s) unless you choose to click on the links provided.
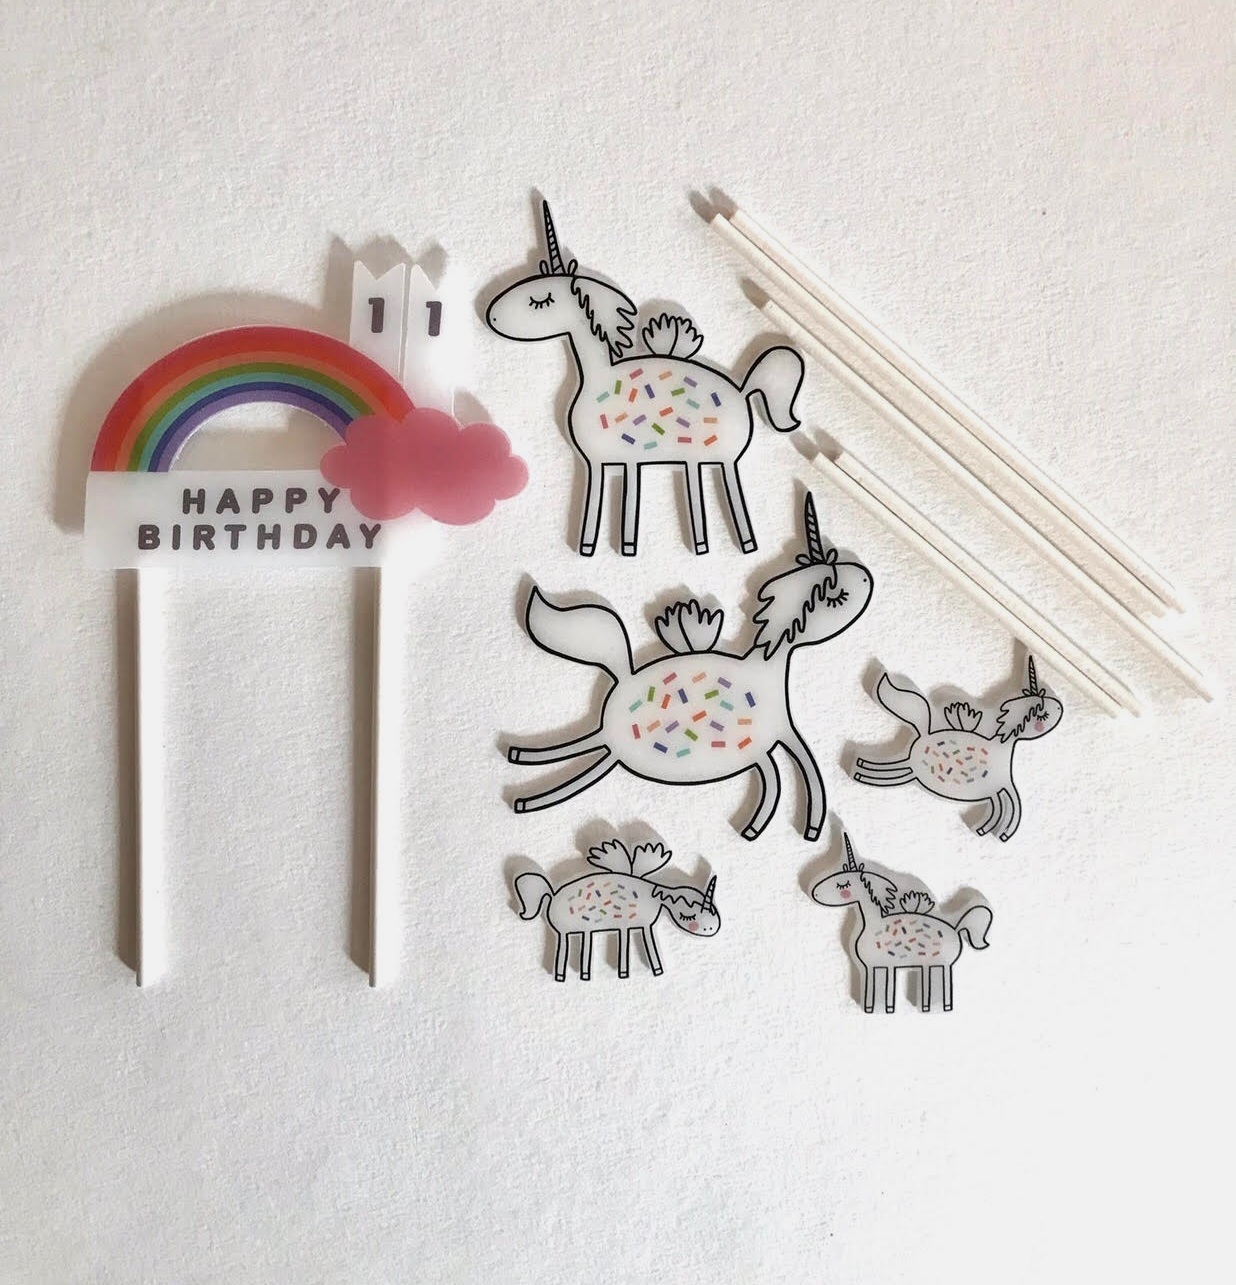
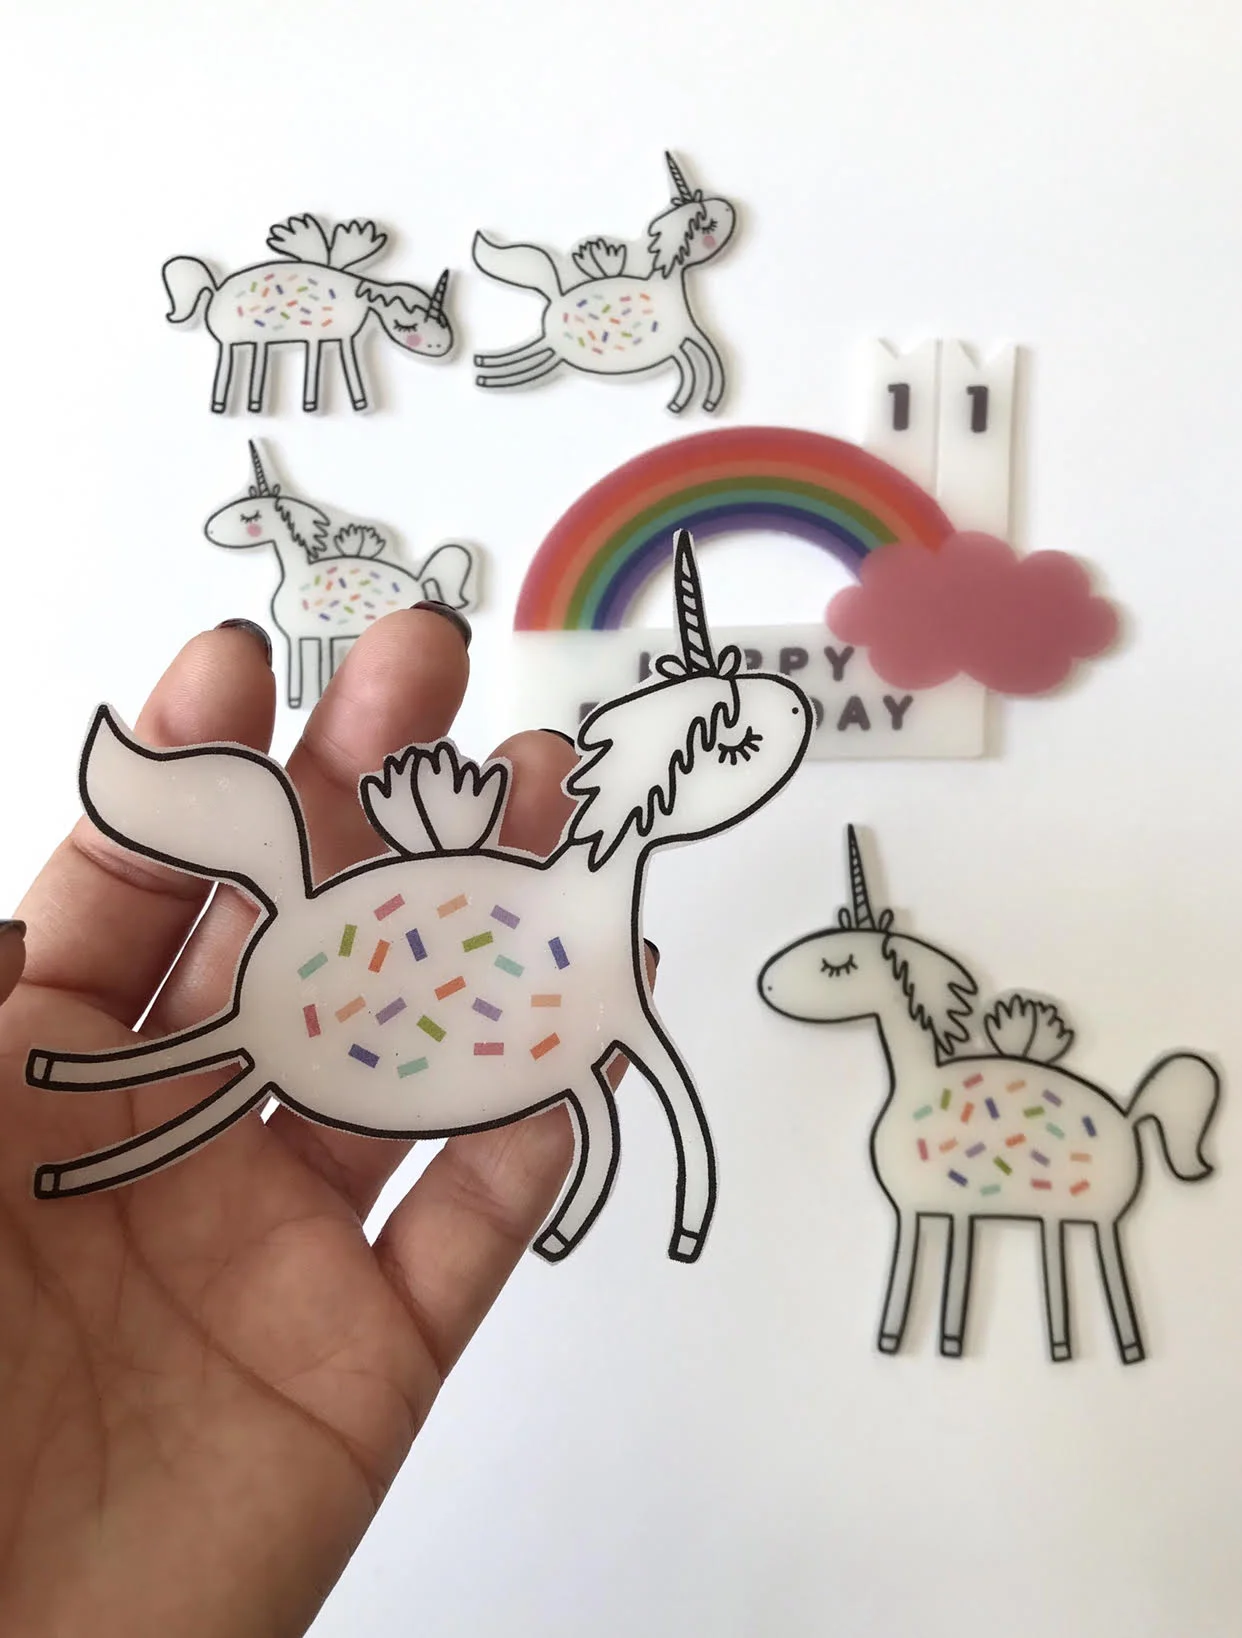
Today I’m sharing how I created these adorable unicorn cake/cupcake toppers using Grafix inkjet shrink film sheets. Not only are they lots of fun to create, they are also super easy to complete in a matter of minutes. All you do is print, heat, and shrink.

Though Grafix acetate film products are safe for food contact and FDA approved. Make sure you are also using toxic-free ink markers, and/or paint in conjunction with Grafix shrink films whenever using on or near food. We used inkjet shrink film sheets in color: clear. We printed ours using printer ink. However, if you are not comfortable using inkjet shrink films, you can swap to Grafix regular shrink film in color: clear to draw or trace any design of your choice using non-toxic markers or paint. Below you’ll find the how-tos for both Inkjet + Regular shrink film instructions.

Supplies needed for Inkjet Shrink film option
Ink Jet Shrink Film in Clear -here
Printer
Lollipop Sticks
Hot Glue Gun
glue sticks

Instructions:
1. Start by taking an image of your choice to print onto a sheet of Ink Jet Shrink Film Color: CLEAR. I designed my own, however, you can use a Free Unicorn Printables here.
2. Print and cut image(s). Pre-heat oven and follow Shrink Film baking instructions for best results.
3. Let cake/cupcake toppers cool, heat hot glue gun, next cut lollipop sticks into assorted sizes.
4. Lastly, add small drops of hot glue to backs of cake/cupcake toppers by gently pressing lollipop sticks to each topper.
Project Time: 30 minutes
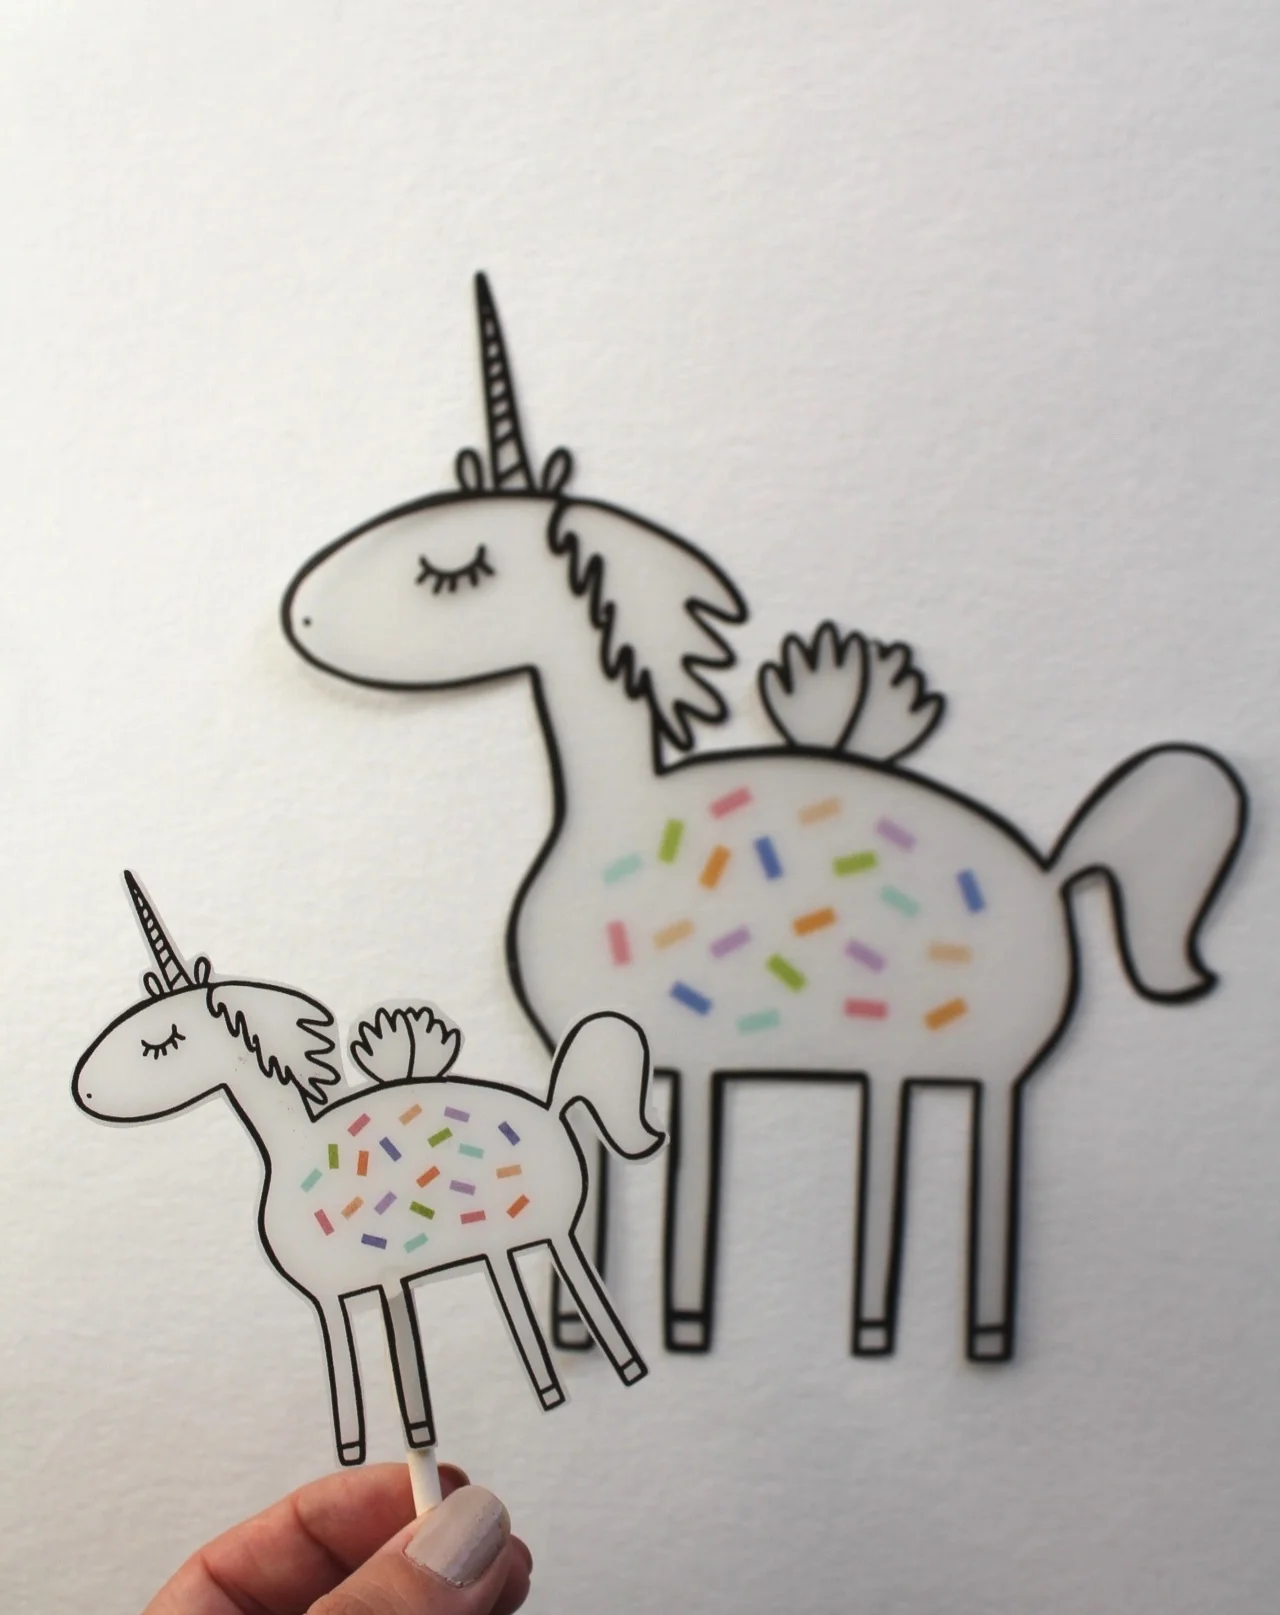
Before and After
Shrunken Unicorn bottom left.
Supplies needed for regular Shrink Film option
Regular Shrink Film in Clear -here
Non-Toxic Markers
Toothpicks
Washi Tape/hot glue
Instructions:
1. Start by hand drawing or tracing image or by using a Free Unicorn Printables here -in conjunction with non-toxic markers.
2. Cut image(s). Pre-heat oven and follow Shrink Film baking instructions for best results.
3. Let toppers cool. once cooled, place toothpicks to back of each topper securing into place with a piece of washi tape or hot glue.
Project Time: 45 minutes
NOTE:
Tall cake toppers pre-shrinkage 8"L x 7"W with a final result size of 3 1/2"L x 3 1/4"W after baking. small cake toppers started out at 3 1/4"L x 4 1/4"W pre-shrinkage with a final result size of 1 1/2"L x 2"W size after baking.
As always. I hope you give this fun DIY a try. Until next time friend. Happy crafting!
-Maritza.